
Travel Guide: From Brazil to Chile by Car – Itinerary, Costs, and Immigration Tips
- Rotas do Continente

- Feb 4
- 17 min read

Leaving Rio Grande do Sul and reaching the Pacific Ocean by car is the dream of many travelers. We crossed Argentina, Chile, and Uruguay on a 14-day journey filled with wine along the way, challenging roads, and no snow—since the trip took place during the summer.
We departed specifically from Passo Fundo, RS, and our final destination was Valparaíso (Chile), where we spent New Year’s Eve.
1. Before Starting the Car: Driving from Brazil to Chile
This is a long trip of over 5,000 km, starting in the state of Rio Grande do Sul. If you’re not used to doing regular vehicle maintenance, it’s essential to take your car to a mechanic before driving from Brazil to Chile to:
Change engine oil and oil filter
Check spark plugs
Inspect brake discs and pads
Check brake fluid
Check coolant quality
Choose tires with at least half of their useful life remaining—or better.
Also, don’t forget the mandatory items (which I’ll explain throughout the post) required in Argentina and Chile:
Fire extinguisher
Tow bar
First-aid kit
Reflective safety vest
Snow chains
Get the Green Card Insurance, and remember that it is not valid in Chile. For Chile, you’ll also need SOAPEX insurance (I’ll explain it in this post), which is valid only in Chile.
2. Starting the Road Trip to Chile: The Strategic Route
With the car ready, luggage packed, documents and mandatory items checked, it’s time to hit the road. Follow the journey below and see what awaits you on this incredible trip, ending in Valparaíso, Chile.
Stop 1: Bagé – RS (Brazil): Heading into the Pampas
We covered about 516 km on the first day and stopped in the city of Bagé, RS, close to the border with Uruguay.

Route from Passo Fundo to Bagé – RS
This route has no tolls, a reasonable number of gas stations, and places to stop and stretch your legs up to Santa Maria, RS (halfway point).
The Júlio de Castilhos > Santa Maria stretch is in poor condition. If you want to avoid it, a good alternative is going through Soledade, then Candelária, and only then Santa Maria.
If you stop in Santa Maria, fill up the tank. Gasoline in Bagé is among the most expensive in RS—up to R$1.00 per liter more than in other cities.
The stretch between Santa Maria and Bagé crosses the heart of the Pampas. Long straight roads, wide-open horizons, and minimalist landscapes typical of South American grasslands, where the horizon often seems endless.
We stayed in Bagé for about three days to visit friends and family. Even if that’s not your case, I still recommend stopping there. If you’re not too tired, another option is to continue to Santana do Livramento, 161 km ahead, and spend the night there.
Stop 2: Santa Fe (Argentina): Entering Argentina and Driving Along Ruta 14

Early in the morning, we took BR-290 toward Uruguaiana, RS. That day we drove about 838 km to Santa Fe.
We arrived in Uruguaiana for lunch and refueled for the last time with Brazilian gasoline.


In Uruguaiana, I realized I had forgotten to print my vehicle document and only had the digital version.
To avoid problems—and having heard that Argentine police can be strict—I went to a print shop and printed the vehicle document and travel insurance policies.
After lunch, refueling, and printing documents, we headed to immigration at the Brazil–Argentina border.

Immigration is located at the border between Uruguaiana (Brazil) and Paso de los Libres (Argentina) and is divided into two sections.
Section 1: You stop the car (no need to get out) and present your ID (issued within the last 10 years) or passport. The agent registers your entry into Argentina.
We were assisted by a very friendly officer, and the process took about 4–5 minutes.
Section 2: With your ID or passport, you drive to the inspection area. Officers will ask for the vehicle registration (CRLV) and Green Card Insurance. Having these documents printed makes everything easier.
They also asked if we were transporting fruits or vegetables and how many people were traveling.
They didn’t ask us to open the trunk this time and released us after checking the documents.
Leaving Section 2, we were officially on Argentine soil, heading to Santa Fe.
Right after immigration, you may see locals waving Argentine pesos, trying to exchange money. Since we already had pesos, we didn’t stop. I personally don’t recommend exchanging money there.
After crossing the International Bridge, we entered Paso de los Libres and drove another 427 km via Ruta 14 and Ruta 127 to Santa Fe.

Ruta 14 is mostly dual carriageway, making the trip faster.
At km 406, you enter Ruta 127, the most monotonous part of the trip: 350 km with little civilization along the way.
Important tip: Fill up at the YPF station gas before leaving Ruta 14.
After 351 km, you arrive in Paraná, bordering Santa Fe.


To enter Santa Fe, you pay your first toll in Argentina and pass through the Raúl Uranga–Carlos Sylvestre Begnis Subfluvial Tunnel, inaugurated in 1969.
After nearly 850 km in one day, we arrived at Colón Hotel, known for hosting famous athletes like Lionel Messi and Carlos Tevez.


After nearly 850 km in one day, we arrived at Colón Hotel, known for hosting famous athletes like Lionel Messi and Carlos Tevez.


Stop 3: Mendoza (Argentina): Land of Sun and Wine

On Christmas Eve, we had 900 km ahead. We left Santa Fe around 7:30 a.m., stopping in Río Cuarto for lunch.
Important warning: The first toll leaving Santa Fe only accepts cash and costs 1,000 Argentine pesos.

Another toll before Río Cuarto costs 1,300 pesos.
We had lunch at Il Milano, a well-rated pizza restaurant—good service, fair price, and tasty pizza.
After refueling (Super gasoline at 1,824 pesos per liter), we continued. Some stations charge 100 pesos to use the air pump.


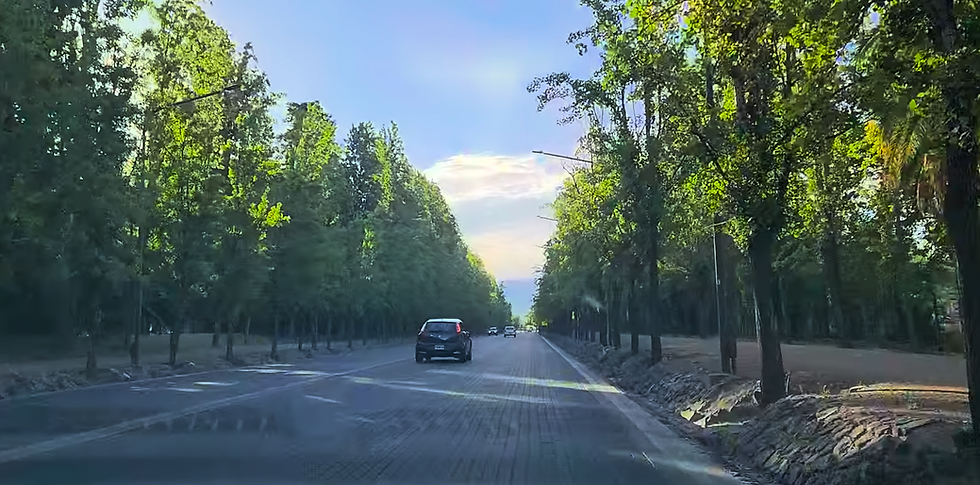
Ruta 30, which leads to Mendoza, is not a dual carriageway, but it’s in good driving condition and has light traffic. The scenery is beautiful, and you already start to see the mountains that are part of the Andes mountain range.
Along this stretch, there is also a very random toll booth that looks abandoned—but it isn’t—and it will cost you 1,000 Argentine pesos.

On Ruta 20 (Km 79), there is a YPF Full gas station, and I highly recommend stopping there to stretch your legs and grab a coffee. The place has a nice convenience store and clean restrooms.
Depending on your fuel level, you may not even need to refuel there. That decision depends on how much range you still have until reaching Mendoza, where you can find gas stations with slightly cheaper fuel than along the highway.
We continued driving for about another 350 km along Ruta 7 until we finally arrived in Mendoza!
We stayed right in the city center, near Plaza Chile, in an aparthotel with a very affordable price and a spacious room featuring a balcony and a table with chairs.


Despite having arrived in the land of wine, I went to the gas station next to the hotel and grabbed a Quilmes beer to toast our arrival and relax a bit before getting ready for Christmas dinner at a restaurant located three blocks from our hotel.

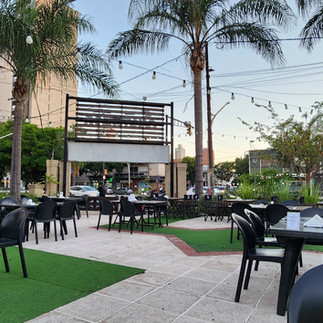
Christmas Dinner in Mendoza
We wanted to have Christmas dinner in Mendoza and found a very good restaurant called Francesco Ristorante.
We purchased the dinner in advance while still in Brazil, and on the day we were served appetizers, a main course, and dessert. In addition, the menu included two regional wines to pair with the dishes and one sparkling wine to enjoy with the dessert.
The food was excellent, and the restaurant itself was great as well. The day was hot, so we sat in the outdoor area. It was a fantastic experience.
Tupungato

On Christmas morning, we woke up later, had breakfast at the hotel, and drove to the Giant Letters Viewpoint of Tupungato. On the way there, we passed through several stunning Andean landscapes. Once at the viewpoint, you can see the imposing Tupungato Volcano, located on one of the highest peaks of the Andes mountain range.
Very close by, it’s also possible to visit Cristo Rey del Valle de Tupungato. The access road is unpaved, but it’s well worth it because of the 360-degree panoramic view you get from the site—along with the impressive Christ monument, of course.

We returned to the city center, where our hotel was located, and decided to look for lunch downtown. However, since it was Christmas, practically everything was closed—except for gas stations.
Argentinians take the Christmas holiday very seriously, and on this day it’s almost impossible to find a restaurant open at lunchtime. Knowing this in advance thanks to tips from the hotel reception, we decided to take a walk along Paseo Peatonal Sarmiento, a famous pedestrian street in downtown Mendoza, known for its trees, cafés, restaurants, shops, and vibrant urban life, connecting Plaza Independencia to Avenida San Martín.

We found only two restaurants open and had lunch at one of them.
In the afternoon, we explored the downtown streets on foot, and by the end of the day we drove to Cerro de la Gloria, passing through Parque General San Martín, which, by the way, is an excellent place to visit and relax.
I really wish my city had a park like this, as it’s simply a great place to go and enjoy the day.
At night, there was already a much wider variety of places open, and I ended up enjoying a bife de chorizo, a classic Argentine dish, along with a local beer.


Visit to Chandon Winery
The day after Christmas, we visited two wineries, and one of them was the famous Chandon, which needs no introduction.


After leaving Chandon, we had a wine-paired lunch at Bodega Las Guapas. A smaller winery, but one with outstanding service—both the lunch and the wines truly deserve praise.
Mercado Central
In the late afternoon, we visited the Mercado Central, a traditional and historic market in downtown Mendoza. It’s the perfect place to experience local culture and gastronomy, offering a wide variety of fresh products (meats, fruits, cheeses), regional wines, cured meats, olive oils, sweets, and handicrafts, as well as a food court with typical dishes and parrilla. A great option for shopping and for feeling the everyday life of the people of Mendoza.
Stop 4: Santiago (Chile): Entering Chile and crossing the Andes Mountains by car — a truly surreal experience!

Day to fill up the tank and head towards Santiago, Chile.
Seriously, I get chills just remembering this place, and I can say it was the most beautiful highway I’ve ever driven on.
Leaving Mendoza, about 70 km later, you’re already faced with Lake Potrerillos and its stunning turquoise-blue waters.
Stop there, stretch your legs, and take in the scenery.
In this region, there’s another YPF gas station, in case you need to use the restroom, grab something to eat, or even refuel.
As the journey continues, you start passing through tunnels carved into the mountains, and the landscape becomes unbelievably beautiful. These are giant mountains with a road cutting right through them, making the place both breathtaking and dangerous at the same time due to the number of curves. Still, I guarantee the scenery is worth every kilometer driven, even in summer, when most of the mountains are free of snow.
They literally cut through the Andes Mountains and built a road right in the middle..
Puente Del Inca

Puente del Inca is an impressive natural bridge in Argentina, formed by colorful rocks and thermal waters. It is an important geological and tourist landmark, featuring the ruins of a former hotel that was destroyed in the 1960s, making it a popular stop along the route.
At the site, you will find authorized car attendants wearing vests who charge a fee to watch your car. There is no fixed price — you pay whatever you think is fair. The same system applies to the restrooms, which require a small payment in Argentine pesos.
There are also places to eat or have a coffee. We ended up having lunch there and found the prices reasonable.
Aconcagua View


126 km ahead, the next mandatory stop is the Aconcagua Viewpoint, where you can see Mount Aconcagua, which reaches an elevation of 6,961 meters, making it the highest mountain in South America.
At the viewpoint, you can park your car and walk about 100 meters to the first lookout point, which already offers an impressive view of Aconcagua. If you want to go further, there are longer hiking trails available as well. You can get more information at the visitor center, which also has restrooms.
Since hiking was not the focus of our trip, we continued driving toward the Argentina–Chile border.
Cristo Redentor Tunnel

This impressive tunnel was carved directly into the rock and is located exactly on the border between Argentina and Chile. It is 3.08 km long, and you literally drive through the mountain. Once you exit the tunnel, you are already in Chilean territory, and the next stop is the customs checkpoint.
3. Arrival at Chilean Customs and Immigration (How It Works)


Even before starting the trip, I had already heard that immigration in Chile is quite strict and time-consuming, so we were prepared for the possibility of spending hours inside the pavilion where the process takes place.
Tip: Complete the sworn declaration online 24 hours before crossing immigration. This will speed up the process inside. If you haven’t done it in advance, you will still need to complete it upon arrival at the customs checkpoint.
Upon arriving at immigration, you park your car in a location indicated by the agents and go to one of the counters, carrying your passport.
With your passport in hand, the immigration officer will check the system and then give you a form to fill out with the vehicle’s information. Having a pen helps speed things up, but if you don’t have one, they will lend you one.
Once the vehicle form is completed, an agricultural inspection officer will begin the vehicle inspection, which basically includes:
Asking if you are carrying any type of fruit or vegetables;
Checking the interior of the vehicle;
Asking you to open the trunk and remove all luggage;
Asking you to open the bags so they can check for prohibited items;
Running a sniffer dog near your luggage.
If everything is OK, a PDI officer (Chilean Investigative Police) will then ask a few questions about the purpose of your trip, when you plan to return, and whether you are carrying items that may exceed the allowed duty-free allowance for entering the country.
An important detail: if you are carrying electronic equipment such as a laptop, camera, or drone, for example, it is essential to have the original purchase receipt with you to avoid possible misunderstandings during inspection.
After that, you will receive a receipt from the PDI containing your immigration information. Do not lose this receipt, as the hotel where you stay in Chile may ask for it along with your passport.
In total, the process took about one and a half hours until we were cleared, which, according to an Argentine traveler we met at the customs checkpoint, was considered fairly quick.
Los Caracoles

After leaving the lengthy customs process, you immediately enter Los Caracoles, considered one of the most beautiful and dangerous roads in South America. There are more than 30 curves along Route 60, where once again you need to divide your attention between the road and the breathtaking scenery. I highly recommend pulling over, taking a few photos, and enjoying the view before continuing the drive.
After all the stunning landscapes and the truly massive mountains along the way, we arrived at our hotel in Santiago in the late afternoon.
After dropping off our bags at the hotel and resting for a bit, we took a drive around the city center and decided to go to Parque Arauco, a huge shopping mall with a mix of indoor and outdoor areas. It’s a great place and offers everything you’d expect from a shopping center. We had dinner there.
I had a hamburger and spent around 15,000 Chilean pesos. On average, burger prices range from 12,000 to 20,000 Chilean pesos.

The next morning, we left the car at the hotel and took an Uber to downtown Santiago, specifically to Plaza de Armas, where the Free Walking Tour we had booked would begin.
I highly recommend doing the Free Walking Tour, as you learn a lot about local history with a guide, and they also always share interesting tips about the city.
Since the Free Walking Tour ended near Plaza de Armas, we had lunch in the area. I chose to try Peruvian food and really enjoyed it.
Sky Costanera e Costanera Center

In the afternoon, we went to the impressive Sky Costanera, the tallest building in South America, already planning to stay there to watch the sunset.
We bought the tickets in advance, and to enter you need to go through an X-ray security check.


At the top of Sky Costanera, you’ll find restrooms, souvenir shops, and also a bar with several tables spread throughout the lounge area, where you can eat and drink while waiting for the sun to set.
Tip: When visiting Sky Costanera, go by car and park at Costanera Center, the shopping mall located at the base of Sky Costanera.
Concha Y Toro Winery

Concha y Toro, located near Santiago, is one of the most respected wineries in South America, with a wide range of wines, many of them award-winning.
Since we would be tasting several wines that day (10 labels in total), we chose not to drive there and went with the Turistik company, with departure in the early afternoon from Plaza de Armas.
If you enjoy wine, the visit is well worth it. There are different tasting options available, and some include cheese pairings for harmonization.
Stop 5: Valparaíso (Chile): An Unforgettable New Year’s Eve in This Iconic Chilean City
We had driven so much to reach Chile that the distance between Santiago and Valparaíso felt like going “just around the corner” — only 121 km.
Around New Year’s Eve, many people leave Santiago and nearby cities heading toward Valparaíso and Viña del Mar. Knowing this, we chose to spend one less day in the Chilean capital so we wouldn’t have to travel on New Year’s Eve itself and could avoid possible traffic jams along the way
The Santiago > Valparaíso drive was very smooth, and we arrived at the hotel still in the morning.
Some people mentioned that in Valparaíso it’s not very advisable to leave your car parked on the street due to theft, so we decided to leave it at the hotel and explore the city on foot, or use a ride-hailing app if needed.
How the Train Between Valparaíso and Viña del Mar Works

Before lunch, we took the train from Valparaíso Port Station and went to Miramar Station in Viña del Mar. Once there, we explored everything on foot.
The train is very easy to use, and the payment system is similar to London’s: you simply tap your credit card at the turnstile to enter, and it opens. When you exit at your destination station, you tap your credit card again, and the fare is then charged.
Remember to have a credit card enabled for international transactions.
A Bit About Viña del Mar
Viña del Mar and Valparaíso have very different atmospheres, even though they are right next to each other.
Valparaíso, largely because of its port, feels more like a big city, and you don’t have easy access to the beach, as the train tracks and security infrastructure — such as fences and high walls — block access.
Viña del Mar is a better-maintained city and has a much more beach-town vibe. However, even in summer, the wind and the currents that rise from the South Pole glaciers through the Pacific Ocean make the water cold and not very inviting for swimming. The sand is a bit coarser than usual, but if you enjoy simply relaxing, watching, and listening to the sea, you won’t regret it.
Walking along the waterfront is also a great option.
There are many restaurants in the city, and some that are well worth visiting, such as Cap Ducal and Nogaró, are located right by the sea.
I felt safer in Viña del Mar than in Valparaíso, although my perception of Valparaíso changed a bit after we did the Free Walking Tour.
Réveillon in Valparaíso

The city of Valparaíso is famous for its long-lasting fireworks display (around 18 minutes).
We managed to stay at a hotel with a privileged view, which, after the New Year’s Eve dinner, opened its rooftop terrace for guests to watch the fireworks show. The display begins with several ships along the coast sounding their horns.
They honk for about 30 seconds, and shortly after that, fireworks start exploding from multiple points over the sea.
The hotel also served sparkling wine on the terrace, and the view was excellent—we could see a large portion of Valparaíso’s coastline, which at that moment was even more illuminated by the fireworks.
4. How Tolls Work in Argentina and Chile
Crossing three borders by car requires attention to each country’s toll system, so pay close attention to the tips below.
In Argentina:Many toll booths already accept card payments, but not all of them.
Most tolls on Argentine routes (such as Ruta 14 and Ruta 7) accept international credit or debit cards.
Cash (Efectivo):It is essential to have Argentine pesos in cash. If your card doesn’t work for any reason, you’ll need cash to pay.
The “Critical Toll”:As mentioned earlier, the first toll after leaving Santa Fe is strict and accepts cash only. Being without pesos there can cause serious trouble, as there are no ATMs nearby.
Technical Tip:In my detailed itinerary, I listed the location of every toll booth and the exact amount we paid, so you can leave home—or the hotel—with the correct amount of cash already separated.
In Chile:All tolls I passed accepted international cards.
Chile has one of the most modern road systems in South America, but also one of the most expensive.
Mixed System:On highways such as Route 60 (Los Caracoles) and Route 68 (Santiago–Valparaíso), you’ll find manual toll booths where payment is made in Chilean pesos (CLP). HOWEVER, on all the routes I traveled, international cards were accepted.
5. What I Wish I Had Known Before Going
The VAT Secret:This is the biggest secret of the trip. In Chile, Brazilian tourists can receive a 19% tax exemption on hotel stays, but the payment rules are strict (international card or cash USD). If you pay incorrectly, you lose the benefit. I detailed the step-by-step process to save this money in the guide.
Wine Allowance:You can bring up to 12 liters of wine per person back to Brazil.
Reliable Gas Stations:Some stretches have very few gas stations, while others have many—but not all feel reliable. Knowing where to find Shell, YPF, or Axion Energy stations helps a lot.They’re not a 100% guarantee, but they’re much safer than fueling at unknown brands.
6. Hassles I Avoided
Digital vs. Printed Documents:The scare I had in Uruguaiana for not having printed documents was a lesson learned. Argentine highway police can be very strict. In the eBook, I explain the police stops we faced and how we handled them.
Andes Weather:Even in summer, the weather changes quickly depending on altitude. Always keep a windbreaker jacket with you, if possible.
Windshield Washer Fluid:Hitting insects is unavoidable on such a long road trip. Your windshield will get dirty frequently, so always refill the washer fluid whenever you stop for fuel.
7. Fuel Logistics (The Fear of Running Out)
There are real “dead zones” with no gas stations on Ruta 127 and in parts of the Chilean desert. Running out of gasoline—Super or Premium—in isolated areas is a real risk.In my detailed itinerary, I included Google Maps links to reliable gas stations and places with good coffee for breaks.
8. Mandatory Insurance
Carta Verde Insurance:To drive in Mercosur countries with your own or a rental car, this insurance is mandatory. You can get it through your current insurance provider or, in the case of a rental car, it’s usually included.
Prices vary widely depending on the insurer and the length of your trip.
SOAPEX Insurance:Since Chile is not part of Mercosur, Carta Verde is not valid there. You must purchase SOAPEX.
Tip:Buy SOAPEX directly from a Chilean insurance company. If purchased from Brazilian companies, it may not be valid in Chile. I bought mine directly from the Chilean HDI website, and it cost USD 10.00 for the days I stayed.
It’s very easy to do, and with this tip, you won’t need to look for an insurance office once inside Chile.
9. Mandatory Items
Fire extinguisher:No longer mandatory in Brazil, but still required in Argentina. Easy to buy online.
Tow bar (Cambão):I had to buy one online to bring along. It’s the most expensive mandatory item.
First aid kit:Costs around R$40 to R$60 and is easy to find online.
Reflective vest:Another item you’ll probably never use again, but it’s mandatory.
Snow chains:I didn’t bring them since I traveled in summer, but they are mandatory in Chile and can be required during a police inspection.
10. Is It Worth Driving from Brazil to Chile?
That depends on the experience you want. For me, it was absolutely worth it—an experience you only understand by living it, discovering places, food, culture, and people firsthand.
But if you’re uncomfortable with long road trips, another option is flying to Mendoza, Argentina, renting a car there, and driving the Mendoza–Santiago route.
What Did You Think of the Trip?
This journey was a dream come true, and it only went smoothly because I planned every detail.
If you want access to my real cost spreadsheet, all the booking links, maps of reliable gas stations, and an even more detailed step-by-step guide to the customs process—all in a PDF easy to consult on your phone, even offline—click the button below and secure the Detailed Brazil-to-Chile Road Trip Guide.
Don’t let your adventure turn into a nightmare due to lack of information!
I WANT MY ITINERARY NOW


Comments